Slack is a great way to share information and collaborate with your coworkers. But did you know that you can also create groups of people on the platform? These groups are called user groups, and they allow for more targeted collaboration between smaller teams based on their needs or interests.
Slack user groups can be an effective way to manage your teams and responsibilities. They seem simple on the outside, but there’s actually a lot more to them than meets the eye.
With so many new people joining and using Slack, it can be hard to find a place where you belong or know how to ask questions. But don’t worry! After reading this blog post, you’ll have all the knowledge needed to start using Slack user groups for your own needs.
In this article, I’ll walk you through some of the most common functions of user groups such as creating, editing, and permissions. I also show how you can rotate user groups members using a schedule for a simple way to help your dev teams support support. Once you get the hang of user groups, you’ll quickly think of a ton of great uses for them.
Here’s how to use Slack user groups:
- Create user groups
- Contact a user group
- Search for Slack groups
- Modify Slack user groups
- Reactivate a user group
- Rotate users in Slack user groups
- Change user group permissions to allow everyone
Note: Slack, by default, requires a Workspace Owner or Slack admin to edit user groups, so you may not see the menus/options explained below. You will need a Slack admin to change user group permissions before you can see them. User groups are also a premium feature and require a paid Slack plan.
What are Slack user groups?
Slack user groups allow you to group people with similar roles or responsibilities under one alias. They can stay connected seamlessly for quick conversations on any topic without needing to switch channels every time there’s an update about something specific like team goals or daily tasks.
For example, you can make a user group that contains everyone on your marketing team with the handle @marketing. When the handle is used in Slack, everyone in the user group is notified.
Slack was designed to help teams work together more efficiently. Utilizing Slack groups to their full potential is a great way to increase your productivity and the output of your team.
Create Slack user groups
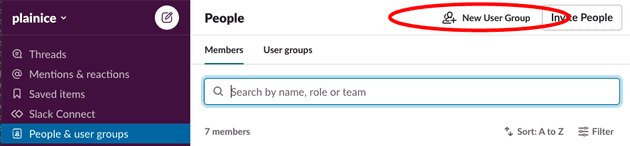
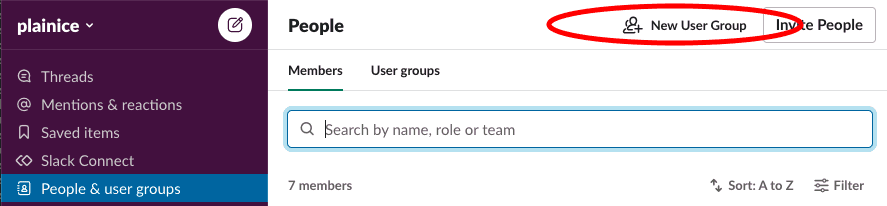
- Select “People & user groups” in the left sidebar menu.
- Select “New User Group” on the top menu.
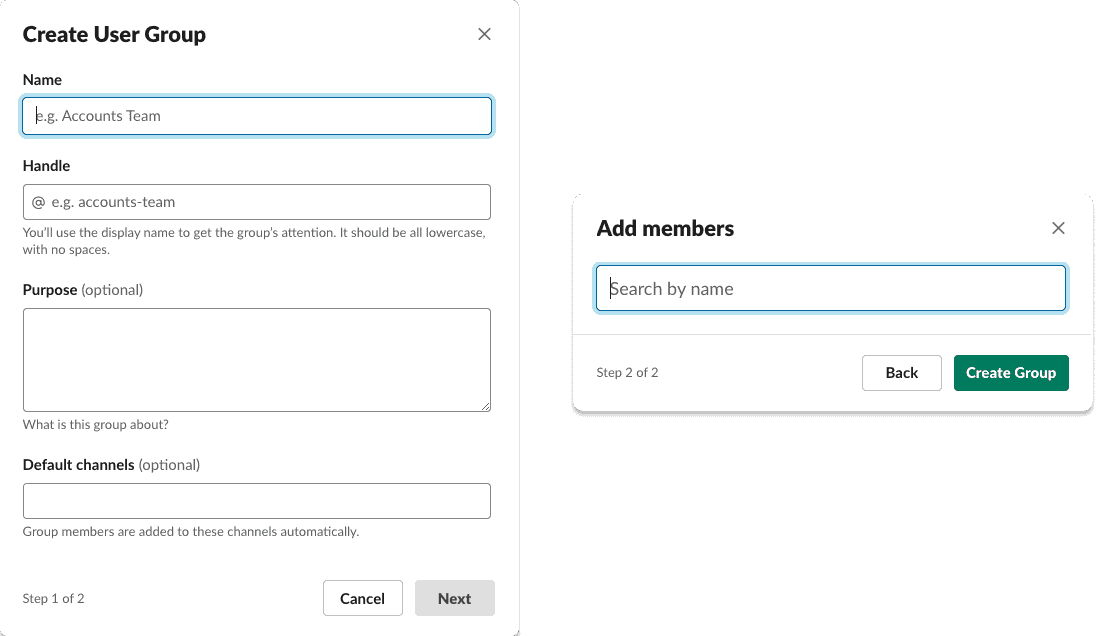
Create a new user group - Follow 2 steps in the “Create User Group” dialog.
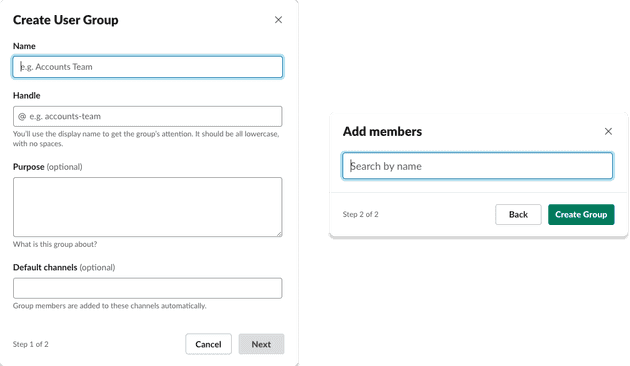
Create new user groups in 2 steps
Contact a user group
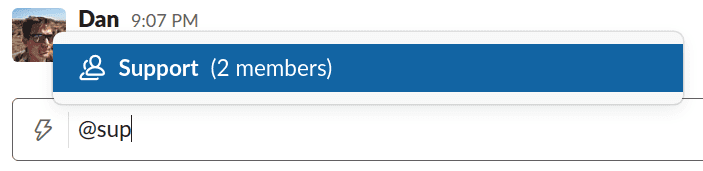
User groups work similar to how you would interact with other users through Slack or social media sites such as Twitter (@).
- Type an
@in Slack’s message input. - Type the first few letters of the group
- Select the user group

Contacting a user group
You can type a message before or after the user group. When you click send, members of the group receive notification (or ping) from Slack and based on their preferences they will get that notification in any way depending how it was set up by them individually.
Search for Slack groups
Depending on how large your Slack workspace is, there may already be user groups set up. Slack provides an easy way to search the groups.
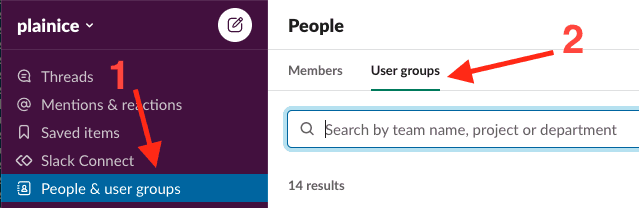
- Select “People & user groups” in the left sidebar menu.
- Choose the “User groups” tab

Search user groups - Type your search
Modify Slack user groups
Slack has multiple ways to edit user groups. The easiest way is to click on the user group you want to edit.
To bring up the user group menu (choose one):
- Click on the user group handle in a message.

Slack message - Select “User groups” from the Slack admin sidebar (see Open your workspace settings)
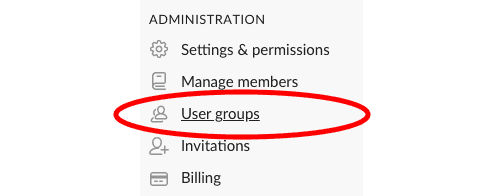
Slack admin user group settings
A side menu will open on the right (see below). From the user group menu, you can add/remove users, deactivate/enable user groups, and change the details such as the handle or name.
Add members to user groups
- Choose “Edit Members” to add members
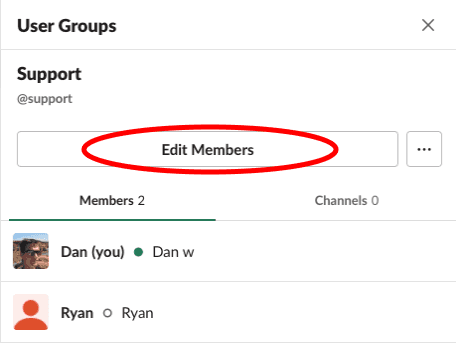
Edit members button - Select members
Remove members from a user group
- Hover over the user in the members list
- Select the 3 dot ellipsis
- Choose “Remove from group…”
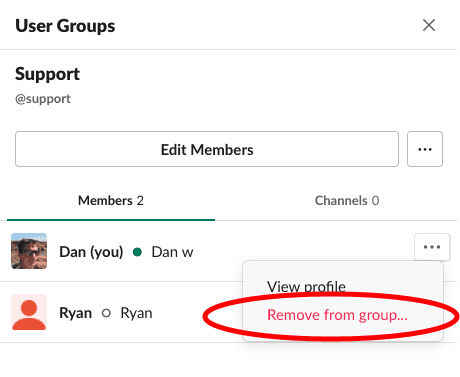
Remove users from user groups
Change a user group handle or name
- Select “Edit group details…”
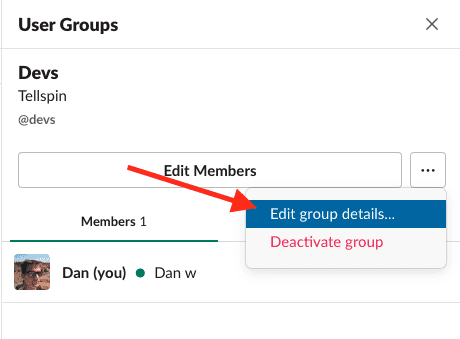
Select edit group details - Change the name or handle

Edit user group details
Reactivate Slack user groups
Slack user groups are never deleted, they are simply deactivated. Sometimes that can cause some issues if someone else created a user group last year, deactivated it, and you tried to create the same group and got an error.
If you’ve seen this error message, “This handle is already in use by a member, channel, or another group.” when creating a new user group, you may need to reactivate the user group.
- Select “People & user groups” in the left sidebar menu.
- Select “User groups” tab in the top menu
- Click “Filter”
- Disable the “Hide deactivated user groups”
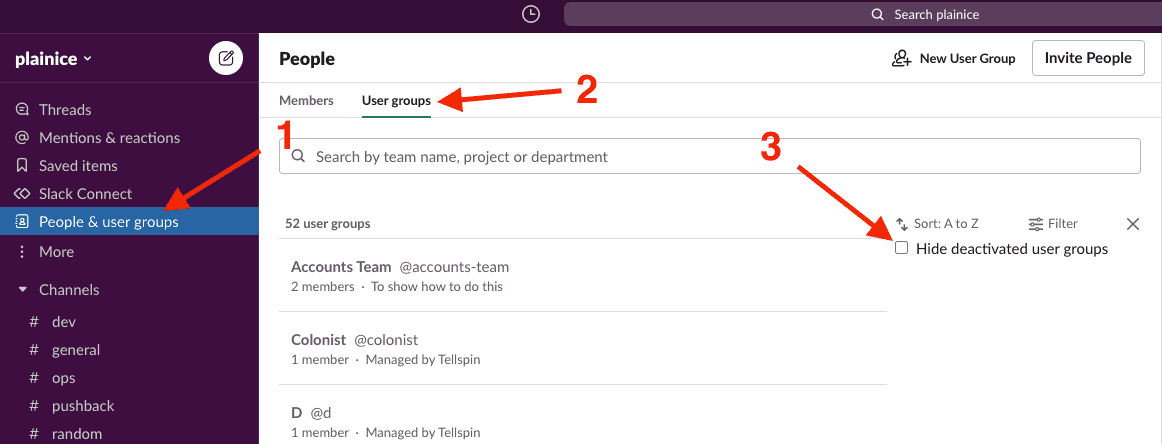
You can now find the user group and enable it.
- Search for the user group
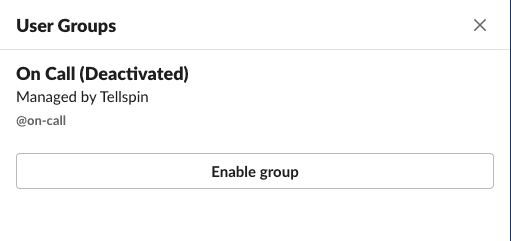
- Select the user group (E.g. @on-call)
- Select “Enable group” in the right sidebar menu
Rotate users in Slack user groups
One way to ensure fairness is by rotating users in and out of a user group. A rotation interval (rota) specifies how often this change should happen, such as every week or month.
With the help of a rota, you can make sure that each user gets their fair share without having one dominate for too long! A rota can be useful to make on-call rotations or simply keep track of who should be doing house keeping tasks.
With the help of a Slack app, your team can have on-call or task rotations with just a few clicks. Tellspin automatically creates on-call or task rotations with the click of one button—generating schedules, sending reminders to team members who are next up for duty (and why), as well as letting you override shifts if necessary so your whole company never misses a beat!

@dev-on-call
Mon

@alex
Tue

@rob
Wed

@sara
Thu

@erik
Fri

@joe
Sat

@dan
Sun

@almos
Install Tellspin
- Click “Add to Slack” on Tellspin’s home page
Slack will prompt you to approve some permissions. Tellspin follows the “least privileged” principle, only requesting permission it absolutely needs to function.
- Tellspin will send a welcome message
- Click “Create a schedule” button

Onboarding message in Tellspin
You can also make a new schedule from Tellspin’s Home screen.
Creating a rotation schedule (rota) with Tellspin
- Choose a contact method
Tellspin has 3 contact methods: User groups, channels, or keywords.
User groups are the most natural since they work like contacting a normal user.
Keywords and channels are great if you’re not a Slack admin or using Slack for free (user groups are a premium feature).

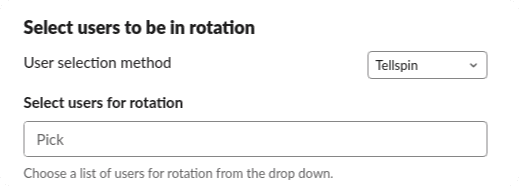
- Choose users to rotate
Tellspin let’s you select users with a dropdown or use user groups to select users in rotation.
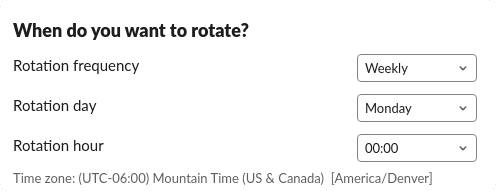
- Select rotation interval
Choose from daily, weekly, two weeks, or monthly for quick setup. Tellspin also allows a lot more customization on rotation intervals to match your team’s needs.
- Everyone can see the schedule in the Tellspin’s
Hometab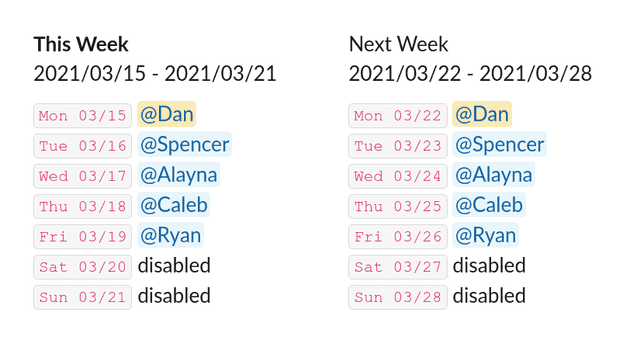
Tellspin rotation schedule

Change Slack user group permissions to allow everyone
You can adjust the permissions if you are a Workspace Admin or Owner by going into workspace settings.
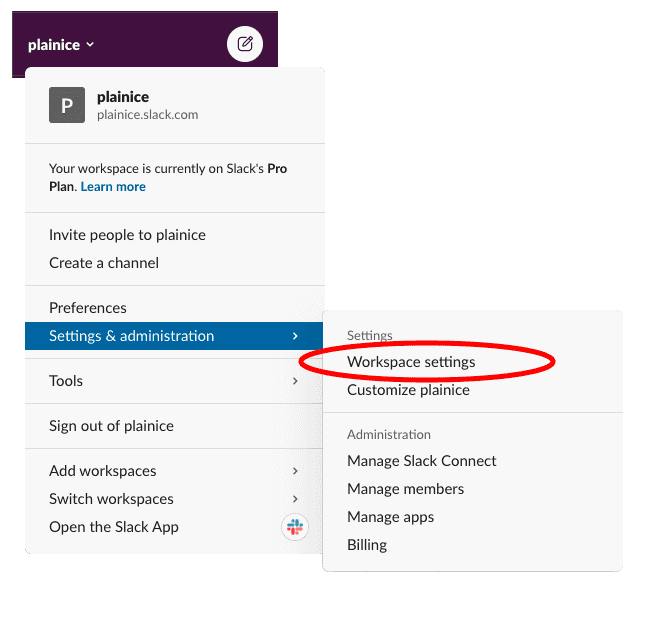
- Open your workspace settings
Click on the dropdown next to your Company’s name, expand “Settings & administration”, and select “Workspace settings”.
- Go to permissions tab

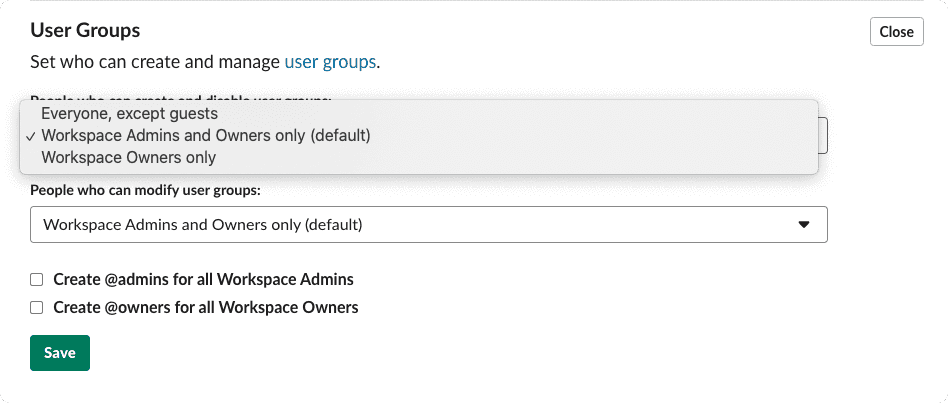
- Change user group permissions
Scroll down until you find the user group section. You may have to scroll down a bit to see it.
Slack has 3 user group permissions, “Everyone, except guests”, “Workspace Admins and Owners only (default)”, and “Workspace Owners only”.
Conclusion
I hope this post has given you some ideas about how Slack user groups may be able to help your organization communicate better internally. A user group can be useful when collaborating on projects with other people. They also provide an opportunity to get feedback on ideas that may eventually become products or services.